How To Remove Duplicates in Excel?
In this article you will learn how to remove duplicates in Excel
What are situations where removing duplicates is useful?
Removing duplicates in Excel can be useful for a variety of reasons, including:
- Data cleaning: When working with large data sets, it's common to encounter duplicate entries, which can distort your analysis and lead to inaccurate conclusions. Removing duplicates can help you to clean up your data and ensure that you're working with accurate and reliable information.
- Reducing file size: Duplicate entries can increase the size of your Excel file, which can cause it to run more slowly and take up more storage space. By removing duplicates, you can reduce the file size and improve performance.
- Creating accurate lists: If you're creating lists, such as a list of employees or customers, removing duplicates can help to ensure that each entry is unique and accurate.
- Consolidating data: If you're merging data from multiple sources, removing duplicates can help to ensure that each data point is only counted once, which can help you to avoid double-counting or other errors.
- Preparing data for analysis: When you're preparing data for analysis, it's important to ensure that each entry is unique and accurate. Removing duplicates can help you to achieve this and ensure that your analysis is based on reliable and meaningful data.
Steps to remove duplicates in Excel
You can remove duplicates in Excel by following these steps:
Step 1: Select the range of cells that you want to remove duplicates from. This can be a single column or multiple columns.
Step 2: Click on the "Data" tab in the Excel ribbon.
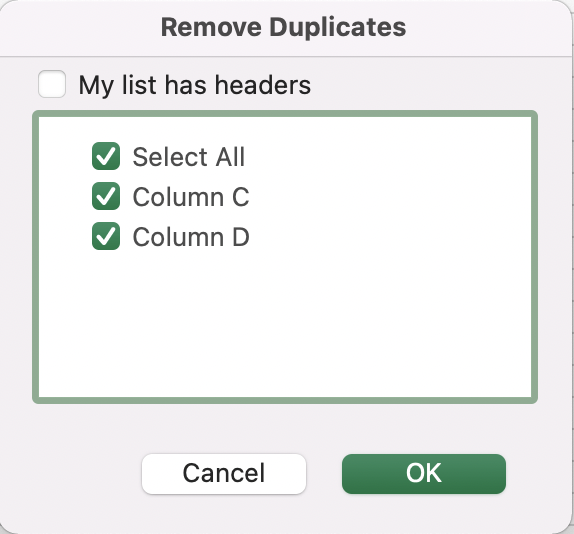
Step 3: Click on the "Remove Duplicates" button in the "Data Tools" group. This will open the "Remove Duplicates" dialog box.
Step 4: By default, Excel will select all columns in your selected range. If you only want to remove duplicates based on certain columns, uncheck the boxes next to the columns that you want to exclude.
Step 5: Click the "OK" button to remove the duplicates. Excel will remove all duplicate entries and leave only the unique entries in your selected range.


Alternatively, you can use the following shortcut key to remove duplicates in Excel is "Alt+A+M". To use this shortcut, follow these steps:
Step 1: Select the range of cells from which you want to remove duplicates.
Step 2: Press "Alt" on your keyboard. This will activate the ribbon.
Step 3: Press "A" on your keyboard. This will activate the "Data" tab on the ribbon.
Step 4: Press "M" on your keyboard. This will open the "Remove Duplicates" dialog box.
Step 5: In the "Remove Duplicates" dialog box, select the columns from which you want to remove duplicates.
Step 6: Click "OK". Excel will remove the duplicate values from the selected range of cells.
Using the "Alt+A+M" shortcut key to remove duplicates in Excel can save you time compared to using the menus to initiate the remove duplicates process.
Note: Before removing duplicates, it's a good idea to create a backup copy of your data or work on a copy of the original data to avoid losing any important information. Also, be careful when removing duplicates as it may impact the accuracy of your data.
Analyze your live financial data in a snap in Google Sheets
Are you learning this formula to visualize financial data, build a financial model, or conduct financial analysis? In that case, LiveFlow may help you automate manual workflows, update numbers in real-time, and save time. You can access various financial templates on our website, from the simple Income Statement to Multi-Currency Consolidated Financial Statement. Are you interested in this product but are an Excel user? That’s not a problem at all. You can connect Google Sheets to Excel quickly.
To learn more about LiveFlow, book a demo.

You can learn about other Excel and Google Sheets formulas and tips that are not mentioned here on this page: LiveFlow‘s How to Guides

